Fermented hot sauce at home: what you need and how to start
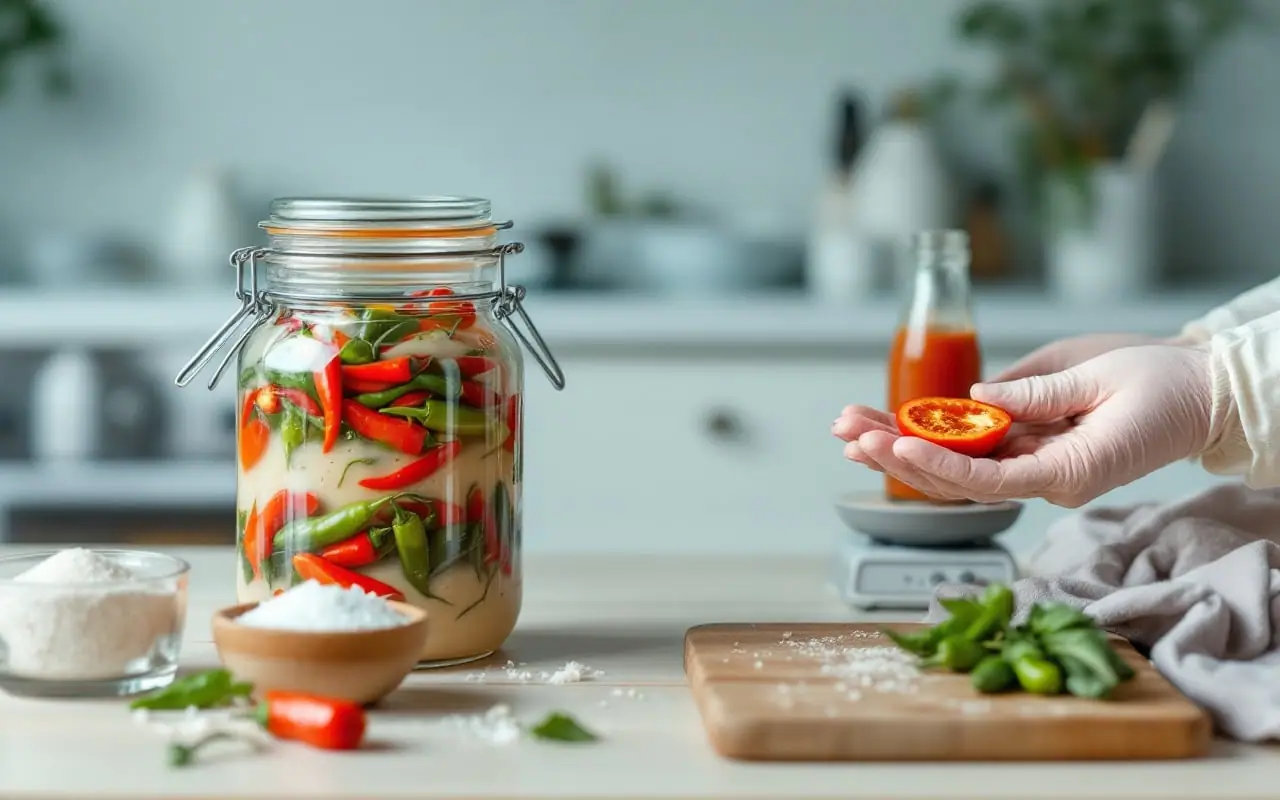
Fermented hot sauce is what you get when chili peppers spend a week or three in salt before they meet the blender. The heat stays, but the raw, grassy edge turns round and sour, closer to a good pickle than to fresh chili, and the sauce keeps far better than a fresh one. It is also one of the kindest ferments to start with. This guide is for a first batch: what you need and what matters when you choose it, the two main methods, a simple fermented hot sauce recipe in steps, and how to tell a healthy jar from one to throw out.
In Kyushu, where I live, the local chili seasoning is yuzu kosho: chilies ground with yuzu peel and salt and left to mature. (In Kyushu dialect kosho means chili, not black pepper.) It is a close cousin of the pepper mash below, and it makes the main point of every hot sauce: measured salt does most of the work.
What you need, and what matters
- A jar of the right size. A 1 liter (US quart) wide-mouth jar is a good first size: enough for several bottles of sauce, and easy to pack and clean.
- A way to weigh salt. Brine strength is a percentage by weight, and a few grams either way matter in a small batch.
- A lid that lets gas out. Peppers give off carbon dioxide for the first week or so. An airlock does this by itself; an ordinary lid works if you open it once a day.
- Something to keep the peppers under. Chili pieces float, and anything above the brine meets air, which is where mold starts.
- Gloves. Capsaicin, the compound that makes chilies hot, is oily and clings to skin.
- Bottles for the end, and room in the fridge for them.
The options
Salt by weight: the arithmetic
A brine percentage means grams of salt per weight of water. A liter of water weighs 1,000 g, so 30 g of salt in a liter of water makes a 3 percent brine. (Strictly, 30 g in 1,030 g of brine is 2.9 percent, which is why recipes say "about 3 percent"; the difference does not matter.)
| Brine strength | Salt per 1 liter of water | Salt per 500 ml of water |
|---|---|---|
| 2% | 20 g | 10 g |
| 3% | 30 g | 15 g |
| 3.5% | 35 g | 17.5 g |
| 5% | 50 g | 25 g |
For a mash, the salt is a percentage of the peppers' weight instead: 2 to 3 percent is usual. Weigh the chopped peppers, then multiply. For 500 g of peppers, 2 percent is 10 g of salt and 3 percent is 15 g.
For a first brine ferment, 3 to 3.5 percent is a comfortable middle: salty enough to hold off spoilage, mild enough not to swamp the sauce. A 2 percent brine ferments faster but leaves less margin in a warm kitchen; 5 percent is slower and suits long ferments or summer heat. Water from the peppers dilutes the brine, so the sauce tastes less salty than the brine did.
Why weigh instead of using spoons? A tablespoon of fine salt can weigh roughly twice as much as a tablespoon of flaky salt, which in a small jar is the difference between a 2 percent and a 4 percent brine. Most kitchens already have a scale; if yours does not, or only reads in 5 g steps, a digital kitchen scale that reads in 1 g steps makes a small batch easy to get right. Use plain salt: iodine can darken vegetables and anti-caking agents cloud the brine.
Mash or brine: two ways to ferment peppers
| Mash | Brine | |
|---|---|---|
| How | Peppers chopped or pulsed, mixed with salt, packed down until their own juice covers them | Whole or halved peppers covered with salt water |
| Salt | 2 to 3% of the pepper weight | 3 to 5% of the water weight |
| Flavor | Concentrated, thick sauce | Lighter, brighter, thinner sauce |
| Watch for | Less liquid on top, so the surface needs pressing down daily | Floating pieces; the brine level |
| Suits | Thick sauces, chili pastes, longer ferments | A first batch, mixed vegetables, a pourable sauce |
The brine method is more forgiving, so the recipe below uses it. For a mash, pulse stemmed peppers in a food processor, weigh them, mix in the salt, pack the mash firmly into the jar until juice rises over it, then weight it down and fit an airlock.
A simple fermented hot sauce recipe
For a 1 liter wide-mouth jar:
- About 500 g fresh chilies. Mix heat levels if you like: a few hot ones with milder red peppers for body.
- Optional: 3 or 4 peeled garlic cloves, a small onion or a carrot, roughly chopped.
- 500 ml (500 g) water. If your tap water smells strongly of chlorine, boil it and let it cool first.
- 15 to 17.5 g plain salt, for a 3 to 3.5 percent brine.
- Vinegar to finish: plain white, cider or rice vinegar. Rice vinegar is often a little milder than the 5 percent acidity usual for white vinegar.
- Put on gloves. Wash the peppers, cut off the stems and halve them. Leave the seeds in for heat, or scrape some out for a milder sauce.
- Stir the salt into the water until it dissolves.
- Pack the peppers, and any garlic or onion, into the clean jar, leaving 2.5 to 5 cm (1 to 2 inches) at the top.
- Pour in brine to cover everything, set the weight on top and check that nothing pokes above the surface.
- Fit the lid, stand the jar on a plate and put it somewhere cool and out of direct sun.
- Check every day: the brine level, anything floating, and the lid if it has no airlock.
- After 1 to 3 weeks, when it smells and tastes clearly sour, it is ready to blend.
What to expect while it ferments
Within a day or three the brine turns cloudy and small bubbles appear. The peppers' bright color dulls, which is normal, and a fine white sediment may settle on the bottom: spent bacteria and yeasts, also normal. Over the first week or so it starts to smell sour, like pickles. Bubbling slows in the second and third weeks. Warmth speeds all of this up; above about 24°C (75°F) vegetables can go soft and spoilage microbes gain ground, so a cool cupboard is the better spot.
You can ferment longer for a deeper, funkier flavor, but the surface needs more care the longer it goes. For a first batch, two weeks is plenty. If you want to know what the bacteria are doing in there, what is a fermented food explains it.
Kahm yeast or mold?
Pepper ferments often grow kahm yeast: a flat, thin film, white or cream, sometimes wrinkled, spreading across the surface as one sheet. It is harmless but can taste stale, so skim it off, wipe the rim and make sure everything is still submerged. It usually means some air got in, or the spot is too warm.
Mold is raised and fuzzy, in spots or patches of white, blue, green or black. Throw the batch out rather than scooping and carrying on. Also throw it out if it is slimy, smells rotten rather than sour, or never turns sour at all: no bubbles and no tang after several days at room temperature means the ferment has not taken, and peppers, like most vegetables, are a low-acid food until it does. When in doubt, throw it out.
Blending, straining and vinegar
Drain the peppers over a bowl and keep the brine. Blend the peppers with a little of it, adding more until the sauce is as thick or thin as you like. Open a window first: blending hot peppers releases fumes that can make you cough.
For a thin, pourable sauce, push it through a fine sieve. The pulp left behind can be spread thin and dried into chili flakes.
Then taste, and add vinegar a little at a time. It sharpens the flavor, lowers the pH further and slows the fermentation that otherwise carries on in the bottle, so the sauce keeps better. Anything fresh you blend in at the end, such as raw garlic, fruit or herbs, has not been through the ferment, which is one more reason to add vinegar and keep the sauce cold. Some people simmer the finished sauce for a few minutes to stop fermentation; it loses its live microbes but will not build pressure in the bottle. Garlic in a pepper ferment is fine once the jar has turned sour. Garlic kept in honey or oil is a different case: it is low in acid, nothing in it is measured, and food-safety specialists do not have a tested recipe for it, so it is not something we suggest.
Bottling and storing
Wash bottles and caps in hot soapy water, rinse and let them dry. Fill them with a small funnel, leaving a little space at the top, and write the date on each one. Keep homemade hot sauce in the fridge. An unheated sauce may keep fermenting slowly, so open a cap now and then, especially in the first weeks. If a bottle grows mold, smells off or spurts hard after weeks in the fridge, throw it out.
Safety with hot peppers
- Wear gloves from cutting to cleaning up. Capsaicin does not rinse off with water alone, so wash your hands, knife and board well with soap afterward, and keep your hands away from your eyes, nose and contact lenses for the rest of the day.
- If chili gets into your eyes, take out any contact lenses and rinse with plenty of clean, cool water for several minutes. If pain, redness or blurred vision persist after rinsing, see a doctor.
- Burning skin usually settles within hours after washing with soap and cool water. Blistering, or burning that does not ease, is worth showing to a doctor or pharmacist.
- Very hot sauces can bring on heartburn, stomach pain or vomiting. If spicy food sets off reflux for you, acid reflux at night explains the common triggers and the warning signs. Chest pain is never something to put down to chili; get urgent help.
- Keep very hot sauces out of reach of children.
- Never store fresh peppers or garlic in oil at room temperature, and do not cut the salt below 2 percent to make a ferment "healthier". Blurred or double vision, drooping eyelids or trouble swallowing after eating home-preserved food can be botulism and need emergency care straight away.
Before your first batch
- Salt weighed in grams: 3 to 3.5 percent of the water for a brine, 2 to 3 percent of the peppers for a mash.
- Gloves on, and a window open when you blend.
- Everything under the brine; check every day.
- Blend when it is clearly sour, add vinegar to taste, bottle it and keep it in the fridge.
How we chose what to describe
The jars, lids, weights, scale, gloves and bottles mentioned here were picked from their specifications, materials, maker information and published reviews. We did not test them, and nothing on this page comes from hands-on trials of particular products. When you shop, check that lids and weights fit wide-mouth jars, whether a kit includes the jars, and that a scale reads in 1 g steps.

The writer
Naoko is a food and nutrition writer from Fukuoka who studied nutrition before she took up writing. She covers gut health and everyday eating, and most of her ideas start at the kitchen counter.